Styx: Blades of Greedrewards patience, observation and creative problem-solving far more than direct combat. Its large, vertically layered regions are built as stealth playgrounds where rooftops, crawl spaces, balconies, tunnels, grapple points and supernatural powers can all lead to the same objective.
The most reliable approach is not to eliminate every enemy. A successful infiltration often means studying patrols, identifying a quiet route, taking only the resources you need and leaving before anyone understands what happened. Quick Save encourages experimentation, while traversal upgrades such as the Grappling Hook, Claw, Glider and Spectral Dash create new ways to revisit previously inaccessible areas.
This guide covers essential beginner advice, advanced stealth techniques, detection, movement, assassination, exploration, Quartz and Amber powers, gadgets, crafting, upgrades, resources and escape planning.
Essential Styx: Blades of Greed Tips
- Quick Save before every risky infiltration, difficult jump or experimental assassination.
- Observe a complete patrol cycle before entering a guarded area.
- Look above and below the obvious route for ledges, tunnels and grapple points.
- Use Amber Vision briefly to gather information, then move using the normal view.
- Plan an escape route before attempting a theft or kill.
- Remain crouched in illuminated or heavily guarded spaces.
- Do not kill guards whose bodies cannot be hidden safely.
- Use distractions to move enemies rather than spending resources to eliminate them.
- Preserve Amber, Quartz and crafted gadgets for obstacles that ordinary movement cannot solve.
- Return to earlier regions after unlocking new traversal abilities.
- Collect crafting materials even when your current inventory is full.
- Break line of sight and change elevation whenever an alarm begins.
Think Like a Thief, Not a Warrior
Styx is extremely capable while hidden but vulnerable once surrounded. Direct fighting should therefore be treated as a failed stealth situation or emergency escape rather than the normal way to clear a room.
Before entering any restricted area, ask:
- What is the actual objective?
- Which enemies genuinely block the route?
- Where can Styx hide if detection begins?
- Is there a vertical path above the guards?
- Can a distraction create a safe opening?
- Where will the nearest patrol be when the objective is collected?
- How will Styx leave after completing the task?
An objective room containing six guards does not necessarily require six eliminations. It may require only one distraction, one climb and a few seconds of careful movement.
Avoid the Completionist-Killer Mindset
Trying to eliminate every enemy creates more opportunities for mistakes. Each kill produces a body that can be discovered, interrupts patrol behaviour and consumes time that could have been spent reaching the objective.
Remove a guard only when doing so provides a clear advantage, such as:
- Opening a permanent route.
- Protecting an escape path.
- Preventing a lookout from watching a required interaction.
- Completing an optional assassination objective.
- Separating a dangerous patrol group.
A guard who never sees Styx is already neutralized for the purposes of the mission.
Use Quick Save as an Experimentation Tool
Quick Save is one of the most valuable features in the game. Use it before testing uncertain movement, unfamiliar abilities or complicated enemy interactions.
Create a Quick Save before:
- Jumping toward a distant ledge.
- Deploying the Glider in an unfamiliar area.
- Using a limited gadget.
- Attempting a Grapple Kill.
- Entering a room with overlapping patrols.
- Stealing an important mission object.
- Testing whether an enemy can be silently eliminated.
- Crossing an area with environmental hazards.
- Spending rare crafting materials.
Save Only When the Situation Is Stable
Do not immediately save after reaching a new position. First confirm that Styx has not been partially seen, that no projectile is already travelling toward him and that a nearby patrol is not about to turn around.
A save made half a second before discovery can trap you in a difficult recovery loop.
Keep More Than One Useful Save
Where manual save slots are available, keep separate saves for:
- The beginning of a mission or major objective.
- A clean infiltration point near the target.
- The moment before using a rare resource.
- The beginning of an optional challenge.
Quick Save handles immediate retries, while separate saves protect a clean earlier state.
Observe an Entire Patrol Cycle
A guard who appears stationary may turn after several seconds, inspect a doorway, speak to another character or walk toward an object in the environment.
Wait long enough to understand:
- Where the patrol turns.
- How long the guard remains facing away.
- Whether another enemy crosses the route.
- Which doors are opened.
- Whether the guard pauses beside food, drink or a workstation.
- Which areas are briefly left unwatched.
Moving after seeing only half a patrol route is one of the easiest ways to walk directly into an unexpected guard.
Watch Groups, Not Individuals
A safe opening against one enemy may still place Styx in front of another. Track overlapping sightlines rather than focusing entirely on the closest patrol.
The ideal moment occurs when several patrols simultaneously face away, separate or move behind architecture.
Learn the Stages of Detection
Enemy awareness is not always an immediate full alarm. A guard may first notice movement, investigate a sound or approach a suspicious location.
Use the early warning period to:
- Move deeper into shadow.
- Back away from the sightline.
- Climb above the investigation area.
- Enter cover.
- Create a distraction elsewhere.
- Relocate before the guard reaches the last known position.
Do Not Remain Where the Guard Saw You
When an enemy becomes suspicious, assume the last observed location is compromised. Move to another hiding place rather than waiting behind the nearest object.
Changing height is especially effective because guards often begin their search on the same floor where Styx disappeared.
Partial Detection Is Recoverable
Do not panic when an awareness indicator begins to fill. A controlled retreat is safer than sprinting blindly through an unfamiliar area.
Break Line of Sight Before Trying to Hide
Darkness does not immediately erase Styx from an enemy's vision. First place solid architecture between Styx and the pursuer.
Useful line-of-sight breakers include:
- Walls and pillars.
- Closed doors.
- Large furniture.
- Building corners.
- Rooftop edges.
- Vertical shafts.
- Floors and ceilings.
Once sight is broken, move again. Hiding directly behind the first corner is predictable, especially when several guards are searching.
Change Elevation During an Escape
Use a grapple point, climbing wall, ledge or drop to move onto another level. Vertical routes are often more effective than trying to outrun guards along a corridor.
Do Not Lead Enemies Toward the Objective
When discovered near an important room, escape in the opposite direction. Drawing a search group toward the target makes the next infiltration more difficult.
Use Darkness Intelligently
Shadow reduces the chance of being detected, but it is not a substitute for cover. A guard standing close enough may still see Styx, particularly when facing him directly.
Combine darkness with:
- Crouching.
- Distance.
- Stationary movement.
- Physical obstacles.
- Height.
- Distractions.
Move Between Islands of Shadow
Treat each dark area as a temporary safe position. Wait there, inspect the next patrol cycle and move only when the next route becomes safe.
Bright Areas Require a Different Plan
When an objective is surrounded by light, search for:
- A route behind the light source.
- An upper ledge outside normal sightlines.
- A way to distract the nearest observer.
- An environmental interaction that changes the lighting.
- A supernatural power that enables a brief crossing.
Look Up Before Moving Forward
Many of the safest routes are positioned above the main path. Roof beams, balconies, cables, cranes, cliffs and towers can bypass large patrol groups.
Before entering a courtyard or fortress, rotate the camera upward and look for:
- Grapple anchors.
- Claw-compatible walls.
- Open windows.
- Broken rooftops.
- Hanging platforms.
- Upper tunnels.
- Glider launch points.
The obvious ground-level doorway is frequently the most heavily guarded entrance.
Also Search Below the Main Route
Styx can use spaces designed for his small size. Check beneath stairs, furniture, bridges and raised floors for tunnels or narrow passages.
Plan the Exit Before Entering
Stealing an item or activating an objective may change enemy behaviour. Guards may move, reinforcements may arrive or the safest entrance may become watched.
Identify at least one escape route before interacting with the objective:
- A grapple anchor above the room.
- A window leading to a roof.
- A ledge below the balcony.
- A tunnel behind furniture.
- A closed door that can break sight.
- A Glider route toward another structure.
- A Spectral Dash obstacle that enemies cannot follow through easily.
Keep One Emergency Tool Available
Do not spend every flask, gadget and supernatural resource on the way into an objective. Preserve at least one option for the exit.
Use Amber Vision in Short Bursts
Amber Vision helps identify enemies, interactive objects and useful environmental details. Activate it from a safe location, gather information and return to normal vision before moving.
A useful scanning routine is:
- Identify every visible guard.
- Check upper and lower levels.
- Locate environmental objects.
- Find containers and crafting materials.
- Confirm the objective's position.
- Choose the next hiding place.
- Deactivate Amber Vision and move.
Do Not Move Blindly While Using a Visual Filter
Special vision modes can reduce your awareness of ordinary textures, ledge depth and lighting. Use the scan to collect information rather than keeping it active throughout every traversal sequence.
Use the Quartz Compass for Direction, Not Navigation
The Quartz Compass can point Styx toward an important location, but the most direct line is not necessarily the safest or even physically accessible.
After checking the compass:
- Compare the direction with visible landmarks.
- Identify the highest nearby vantage point.
- Look for routes that approach from above or behind.
- Check whether a newly unlocked ability opens a shortcut.
- Mark a safe return route mentally.
Use the compass to answer “where,” then use observation to determine “how.”
Master Crouched Movement
Crouching lowers Styx's profile and makes low furniture, walls and small passages more useful.
Remain crouched when:
- Crossing a lit room.
- Moving beneath windows.
- Passing close to guards.
- Approaching low cover.
- Entering a crawl space.
- Waiting behind furniture.
Standing Up Can Expose Styx Instantly
A barrier that completely hides a crouched Styx may offer no protection while standing. Avoid changing stance until the camera confirms that the upper body will remain concealed.
Do Not Crouch Everywhere
When no enemies are nearby, ordinary movement makes exploration faster. Change pace according to the current risk instead of remaining permanently slow.
Control Jumping and Landing Noise
A successful jump is not automatically a stealthy jump. Landing beside a guard or on a noisy surface can reveal Styx even when the movement itself was technically perfect.
Before jumping, inspect:
- The landing surface.
- Nearby guards.
- The direction Styx will face after landing.
- Whether a second jump will be required.
- Any lower ledges that can catch a failed attempt.
Preserve the Double Jump
Use the first jump to establish the trajectory. Save the second jump for correcting distance, gaining height or changing direction near the destination.
Use Intermediate Ledges
A series of short controlled jumps is safer than one dramatic leap across a large guarded space.
Use Wall Dash as Part of a Route
Wall Dash is most effective when combined with climbing, jumping and grappling rather than used as an isolated movement trick.
A typical sequence may involve:
- Jumping toward a compatible wall.
- Using Wall Dash to maintain horizontal movement.
- Double-jumping near the end.
- Grabbing a ledge or firing the Grappling Hook.
Practise Away from Guards
Learn the required angle and timing in a safe area. Failed Wall Dash attempts in a guarded courtyard can result in noise, fall damage or immediate detection.
Use the Grappling Hook to Control Elevation
The Grappling Hook is both a traversal tool and an escape mechanism. It can remove Styx from ground-level danger faster than ordinary climbing.
Look for anchors before beginning an infiltration. Remember at least one that can be reached during an emergency.
Grapple from Concealment
When possible, fire the hook from behind cover or after a patrol turns away. Rapid vertical movement may still be noticed by enemies with a clear view.
Check the Landing Area
An anchor above the guards may lead to a platform occupied by another enemy. Scan the destination with Amber Vision or the camera first.
Use Grapple Routes in Reverse
A route discovered while approaching an objective may become the fastest escape after the mission state changes.
Use the Glider for Infiltration, Not Only Travel
The Hang Glider can bypass guarded bridges, walls and ground-level entrances. High launch points often reveal alternative ways into restricted structures.
Before launching:
- Choose a dark or isolated landing area.
- Check for ranged enemies and lookouts.
- Confirm there is enough clearance from the wall.
- Identify a backup ledge below the destination.
- Make a Quick Save.
Do Not Aim Only for the Objective
Gliding directly to the objective may place Styx in the most guarded section of the area. Landing on a nearby rooftop can provide time to observe and plan.
Use Height to Extend the Glide
Climb as high as practical before launching. A slightly longer setup can provide significantly more control and distance.
Use the Claw to Avoid Conventional Entrances
The Claw allows Styx to move across compatible surfaces and reach routes unavailable to larger enemies.
Search outer walls and cliff faces for climbable sections before entering through a door or gate.
Check the Entire Surface
A climbable wall may begin behind debris, beneath a balcony or above a short jump. Move the camera slowly instead of checking only the section directly in front of Styx.
Remain Aware While Climbing
Styx can still be visible on a wall. Pause behind architectural features or move when nearby lookouts turn away.
Use Spectral Dash to Bypass Problems
Spectral Dash creates routes through compatible obstacles and can help Styx escape a compromised position.
Use it when the ability:
- Bypasses a heavily guarded doorway.
- Reaches a hidden room or collectible.
- Creates an escape that enemies cannot easily follow.
- Shortens a dangerous route.
- Opens a previously inaccessible section of an older region.
Do Not Spend Quartz on Convenience Alone
When an ordinary climb or detour is safe, preserve the resource for a barrier that cannot be crossed normally.
Inspect the Other Side First
A supernatural shortcut may lead into another guarded room. Use the camera and Amber Vision wherever possible before committing.
Use Cover to Gather Information
Cover is most useful as an observation position. Hold against a corner, watch the patrol and leave only when the entire route is clear.
From cover, check:
- Which guard can see the doorway.
- Whether another enemy approaches from behind.
- Where the nearest shadow begins.
- Which environmental object can create a distraction.
- Whether the target pauses close enough for a silent action.
Do Not Treat Cover as Complete Protection
Low cover may hide Styx from one direction but leave him exposed from the side or above. Rotate the camera frequently.
Move Away After Creating Suspicion
When a guard begins investigating the corner, retreat to another position instead of remaining attached to the same cover.
Use Distractions to Reshape Patrols
A distraction is often more valuable than a kill because it temporarily changes several enemy positions without leaving evidence.
Use distractions to:
- Pull a guard away from a doorway.
- Separate two enemies who watch each other.
- Create space beneath a grapple point.
- Move witnesses away from an assassination target.
- Redirect a search after partial detection.
- Clear a route toward the objective.
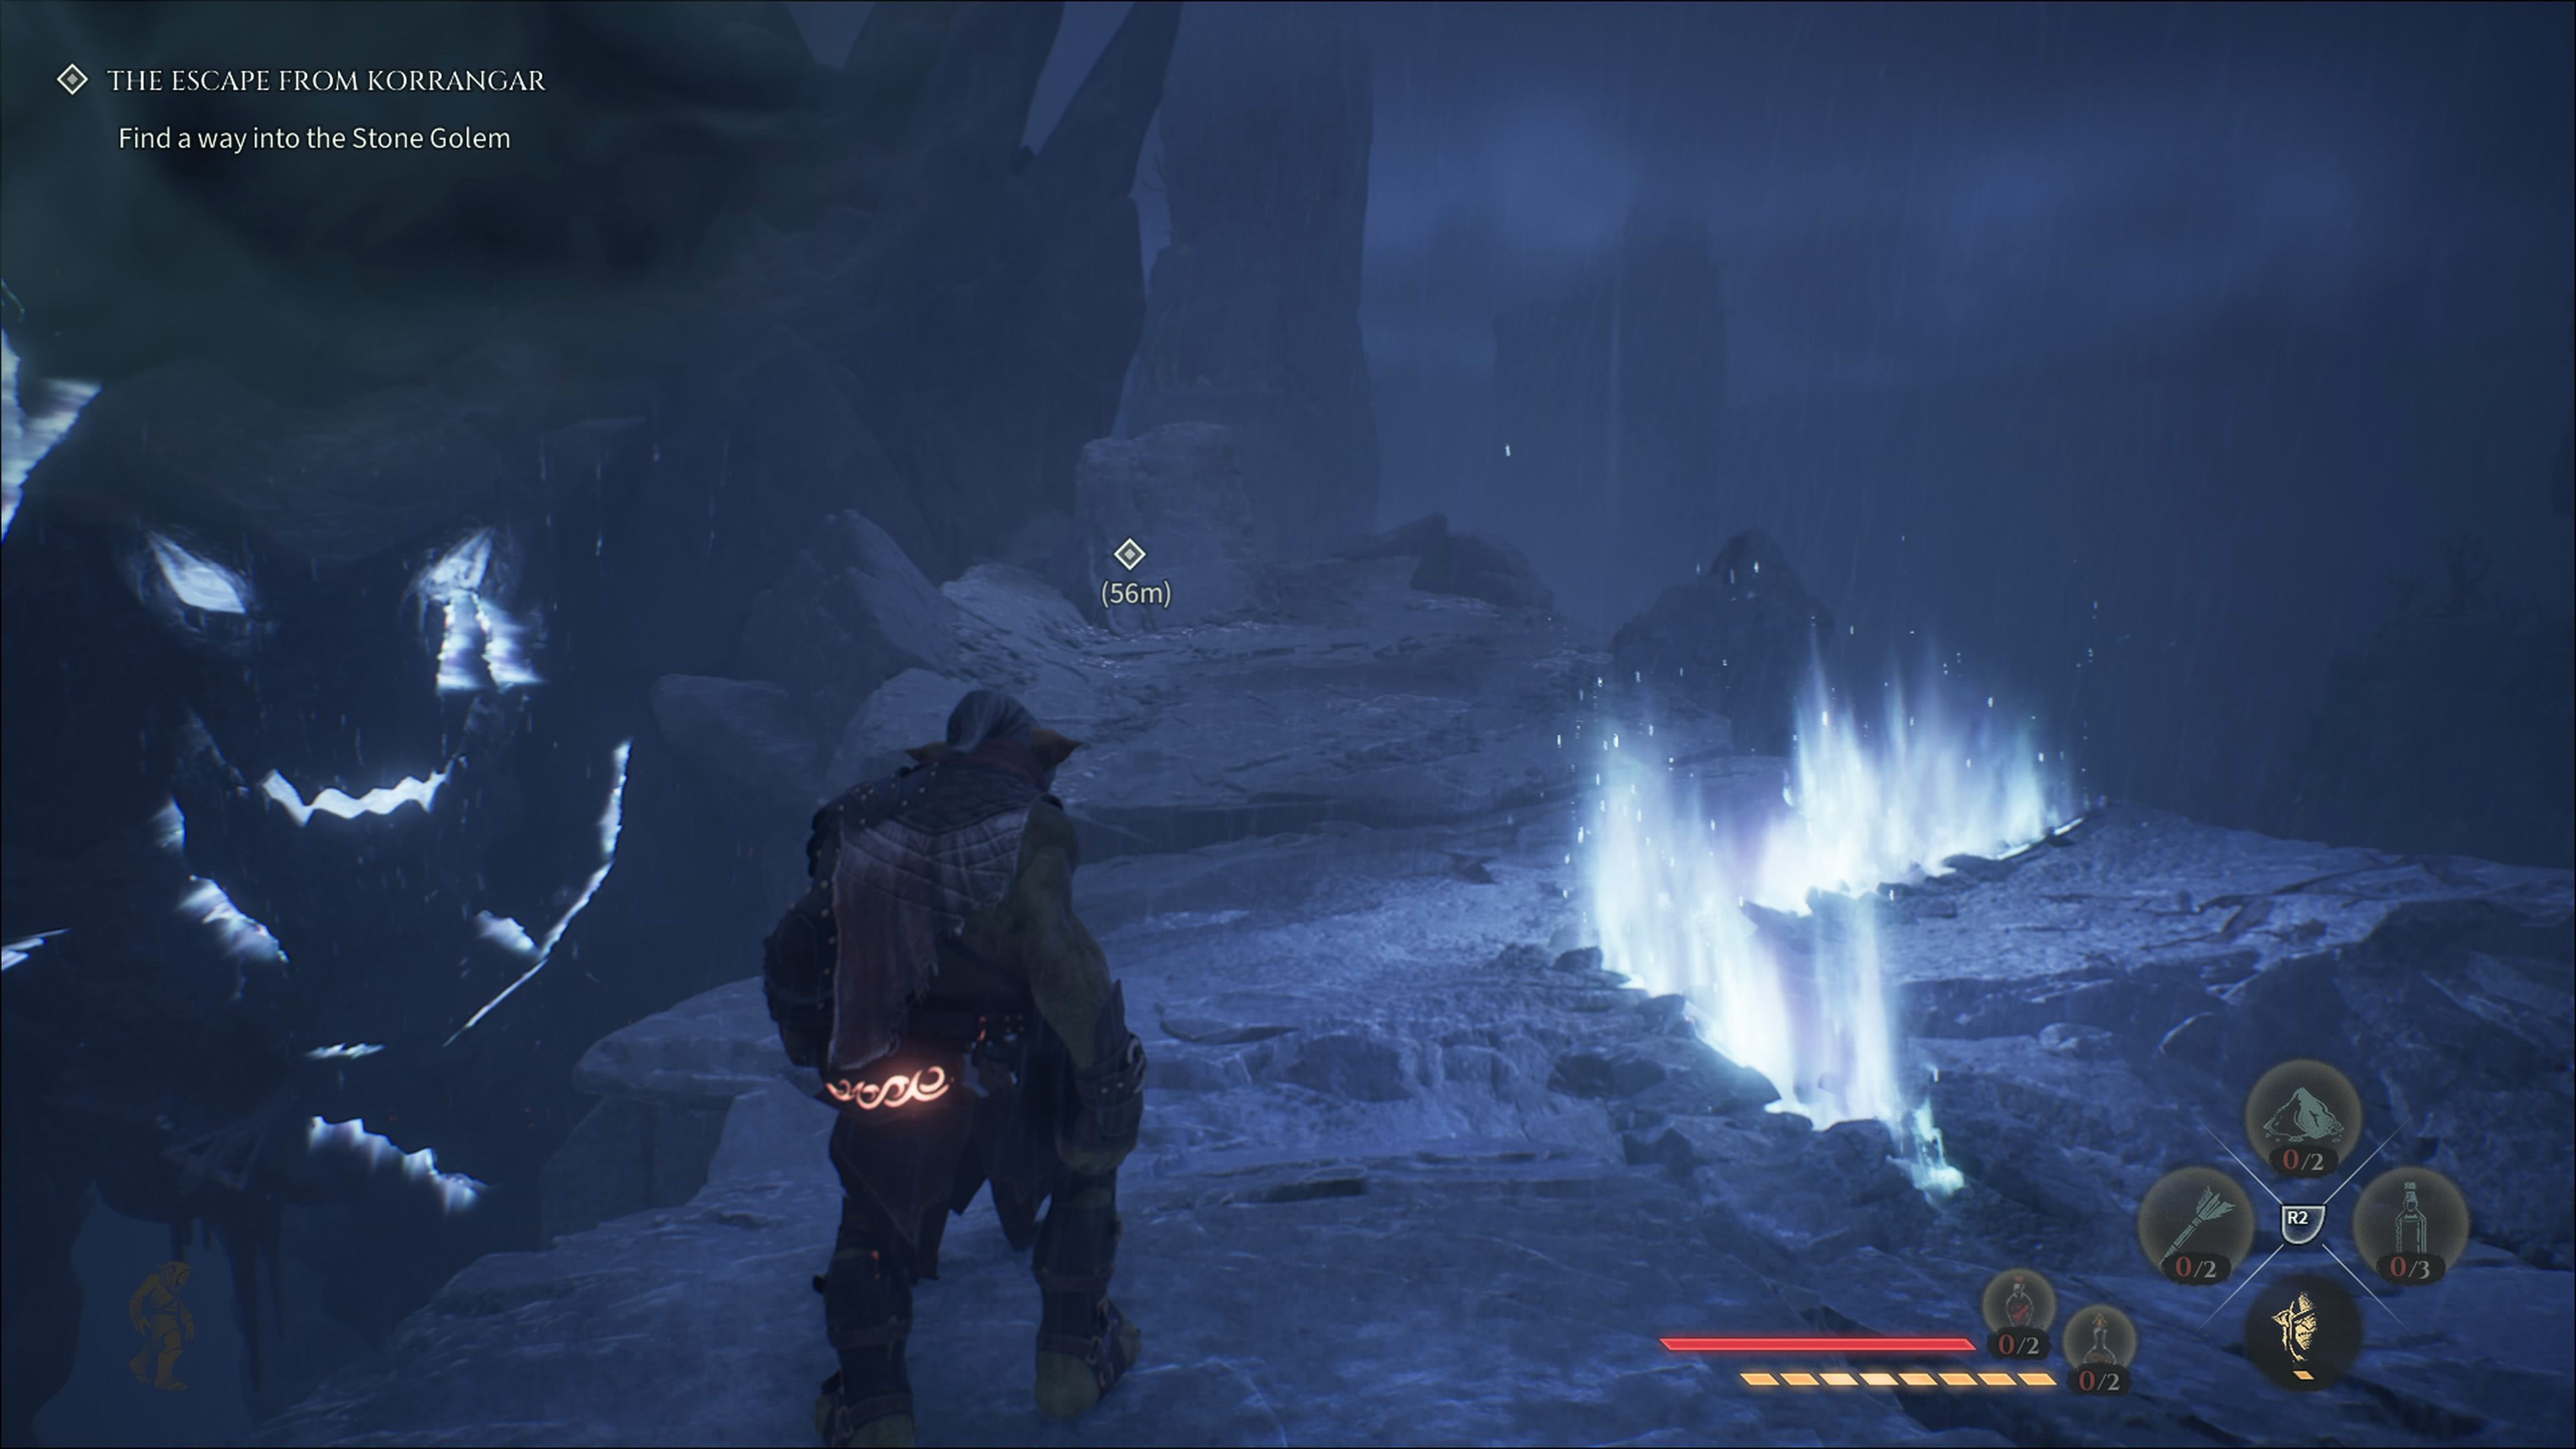
Predict the Investigation Route
Do not create noise randomly. Choose a location that causes the guard to walk away from Styx's intended path.
Move While the Guard Investigates
The distraction creates a temporary opening. Use it immediately rather than watching the entire investigation from the starting position.
Avoid Repeating the Same Trick
Repeated disturbances in one location may keep guards alert and make their movement less predictable. Relocate after using the opportunity.
Separate Guards Before Attempting a Kill
Two enemies standing close together often protect each other. Use sound, environmental interactions or supernatural abilities to separate them.
Wait until:
- The target is outside the other's sightline.
- The second guard is committed to an investigation.
- The body can be moved before the patrol returns.
- No third enemy is approaching.
Do Not Attack During a Conversation Without Checking the Area
Two speaking guards may eventually separate naturally. Listening for a few moments can provide a safer opportunity than forcing one.
Choose Silent Kills Carefully
Before eliminating a guard, determine whether the kill animation, final body position and escape route are safe.
A good assassination opportunity has:
- No witnesses.
- A nearby hiding place.
- A predictable patrol return time.
- Enough darkness or cover for the animation.
- A clear escape route.
Do Not Kill in the Middle of a Patrol Route
Even when no one sees the initial attack, another guard may discover the body moments later.
Use Height for Isolation
Enemies on balconies, towers and isolated platforms are often easier to remove because fewer patrols can observe them.
Consider Leaving the Body Where It Falls
Carrying a corpse is not always necessary. When the body lands in an inaccessible roof area or isolated room, moving it may create more risk than leaving it.
Hide Bodies Before Continuing
A corpse can trigger a search long after Styx has left the area. Hide important bodies before advancing toward another objective.
Good hiding places include:
- Containers designed for bodies.
- Dark rooms with no patrol traffic.
- Areas beneath or behind large furniture.
- Upper ledges inaccessible to ordinary guards.
- Dead ends away from objectives.
Do Not Place Bodies Near Frequently Used Doors
A seemingly empty room may later be visited by a scripted patrol. Move the body away from entrances and common paths.
Carry Only When the Route Is Clear
Styx is slower and less flexible while carrying a body. Observe the full route to the hiding place before picking it up.
Use Environmental Opportunities
The environment can solve problems without direct confrontation. Inspect food, drink, fragile objects, mechanisms and hazards for contextual interactions.
Environmental actions may:
- Distract enemies.
- Remove an isolated target.
- Create noise in another room.
- Block or open a route.
- Change patrol behaviour.
- Allow Styx to conserve gadgets and supernatural resources.
Observe Who Uses the Object
Before poisoning or sabotaging something, confirm which character interacts with it. The nearest guard may not be the intended target.
Leave the Area After Setting a Trap
Do not remain beside a sabotaged object waiting for the result. Move toward the next part of the plan while the environment handles the target.
Use Doors as Stealth Tools
Doors can interrupt sightlines, separate enemies and slow a search.
Close a door when it:
- Hides Styx from a corridor patrol.
- Prevents another room from seeing a body.
- Creates time to climb or use an ability.
- Makes a restricted area appear undisturbed.
Listen Before Opening
Pause beside a door and inspect the room with the camera or Amber Vision where possible. Opening a door directly into a guard is avoidable.
Do Not Slam Through Every Doorway
Move carefully and close the door behind Styx when doing so will not attract attention.
Avoid Direct Combat Whenever Possible
Styx is not built to survive prolonged fights against groups. Direct combat removes many of his advantages and attracts enemies from nearby areas.
When combat begins:
- Dodge the immediate attack.
- Move behind solid cover.
- Break line of sight.
- Change elevation.
- Use a gadget or ability to delay pursuit.
- Hide somewhere other than the last known position.
Do Not Stay to Finish a Fight
Even when one enemy is nearly defeated, additional guards may be approaching. Escape before the situation becomes impossible.
Use Combat to Create an Exit
A dodge, brief attack or disabling ability should help Styx reach safety. It should not become the beginning of a prolonged battle.
Understand Ability Mode Before Entering Danger
Ability Mode assigns supernatural powers to contextual buttons while its trigger is held. Learn the location of each power in a safe area.
Before a difficult infiltration:
- Open Ability Mode.
- Review every assigned icon.
- Confirm which ability set is active.
- Check the Amber or Quartz resource level.
- Decide which power will be used first.
Do Not Search the Ability Wheel While Exposed
Prepare from cover. Hesitating over icons in front of an alerted guard usually wastes the opportunity.
Build Muscle Memory
Use the same ability positions consistently when customization permits. Familiar placement makes emergency activation much faster.
Use Amber Powers to Create Openings
Amber abilities are most effective when used to solve a specific tactical problem rather than activated without a plan.
Depending on the powers unlocked, Amber can support:
- Concealment.
- Deception and clones.
- Distractions.
- Enemy manipulation.
- Safe movement through exposed areas.
- Escape after detection.
Use Invisibility for Crossing, Not Waiting
When a concealment ability has limited duration or resource cost, activate it immediately before entering the dangerous sightline.
Know exactly where Styx will stop before spending the resource.
Send a Clone Where You Need Attention
A deceptive double is most valuable when it draws guards away from the real route. Position it beyond the objective or on the opposite side of the room.
Do Not Spend Amber on a Problem Solved by Patience
If a guard will naturally turn away in five seconds, wait. Preserve Amber for overlapping patrols, emergencies or optional areas.
Use Quartz Powers for High-Value Obstacles
Quartz abilities expand Styx's movement and control options. They can help bypass barriers, influence enemies or alter the timing of a dangerous situation.
Reserve Quartz for moments when it provides a unique advantage:
- Passing an otherwise inaccessible obstacle.
- Escaping a search group.
- Controlling a high-priority enemy.
- Crossing several overlapping sightlines.
- Reaching a valuable hidden area.
Combine Quartz with Ordinary Stealth
A time-related or control power is strongest when Styx already knows the route. Activate it only after choosing the destination and identifying the next hiding place.
Do Not End an Ability in the Open
Always consider what happens when the effect expires. Reach cover, darkness or a vertical escape before returning to normal conditions.
Use Mind Control Strategically
When mind control becomes available, treat the controlled enemy as a temporary tool for changing the environment or patrol arrangement.
Possible uses include:
- Moving a guard away from a doorway.
- Separating a dangerous patrol.
- Reaching a switch or interaction point.
- Creating confusion in another part of the area.
- Opening a route for Styx.
Move Styx to Safety First
Before controlling another character, place Styx in a hidden location. His real body should not remain exposed while your attention is elsewhere.
Plan the End of Control
Know where the affected enemy will be when the power ends. Leaving the guard beside Styx's hiding place defeats the purpose.
Use Time Manipulation with a Route Prepared
Slowing enemies or altering the flow of time is valuable only when Styx acts immediately.
Before activating it:
- Face the intended route.
- Confirm the destination.
- Check the resource cost.
- Identify the first enemy who may recover.
- Prepare the next ability or gadget.
Do Not Use It Merely to Observe
Gather information beforehand. The supernatural window should be spent moving, stealing or escaping.
Use Grapple Kills Against Isolated Targets
Grapple Kill can remove an enemy from an advantageous position after the relevant ability is unlocked.
Before using it, check:
- Whether the target is being watched.
- Where Styx will finish the action.
- Where the body will land.
- Whether another enemy can hear or see the result.
- Which escape route remains available.
Do Not Let the Spectacle Replace Good Stealth
An advanced assassination is still dangerous when performed in front of witnesses. Use it because it solves a route problem, not merely because the prompt appears.
Use Gadgets to Support a Plan
Gadgets provide solutions when movement, patience and supernatural powers are insufficient. Their value depends on timing and placement.
Before using a gadget, decide whether it will:
- Create a distraction.
- Disable or eliminate a target.
- Protect an escape route.
- Separate a group.
- Prevent an alarm.
- Conserve Amber or Quartz.
Do Not Hoard Every Gadget
Finishing a mission with a full inventory does not help if an earlier tool could have prevented repeated failure. Use resources when they create a clear and meaningful advantage.
Do Not Waste Them on Routine Patrols
A single guard following a predictable route can usually be bypassed without spending anything.
Place Traps Where Guards Naturally Walk
A trap is most reliable when placed on an established patrol route, beside an investigation point or near an object the target regularly uses.
Avoid placing traps:
- Where another harmless patrol may trigger them first.
- In direct view of a guard.
- Beside Styx's planned escape route.
- Near an objective that will later require quiet access.
Create a Reason for the Target to Approach
Combine the trap with a distraction when the guard does not naturally walk through the chosen position.
Craft According to the Next Objective
Crafting is most effective when it responds to a known challenge. Review the objective and surrounding enemies before spending materials.
Prepare differently for:
- A long infiltration with limited resupply.
- A fortress containing many grouped guards.
- An assassination objective.
- A brightly illuminated area.
- A traversal-heavy route.
- An optional challenge requiring no detection.
Keep Materials in Reserve
Do not convert every ingredient immediately. Unspent materials preserve flexibility when a later obstacle requires a different tool.
Craft Before Entering a Restricted Area
Use a safe location rather than opening menus in the middle of a patrol route.
Replace What You Actually Use
If one gadget repeatedly solves problems in your playstyle, keep enough materials to replenish it. Do not craft items merely because their inventory slot is empty.
Collect Materials While Exploring
Crafting materials provide future options, so collect them even when the immediate route does not require a gadget.
Search:
- Storage rooms.
- Workshops.
- Guard posts.
- Hidden upper platforms.
- Side rooms away from the objective.
- Containers beneath furniture.
- Previously inaccessible areas opened by new tools.
Do Not Risk the Mission for Common Materials
A small resource pickup is rarely worth triggering a fortress-wide alarm. Mark the location mentally and return when the patrol pattern is safer.
Choose Upgrades That Match Your Playstyle
The best upgrade is not always the one with the most dramatic description. Prioritize abilities that solve the problems you encounter most often.
Consider investing in:
- Traversal upgrades if you enjoy exploration and alternate routes.
- Resource efficiency if you frequently use Amber or Quartz powers.
- Gadget improvements if crafted tools support your infiltration style.
- Detection and concealment upgrades if remaining unseen is difficult.
- Assassination options if optional objectives require eliminating targets.
Prioritize Versatile Abilities Early
An upgrade useful in nearly every mission usually provides more value than one designed for a rare combat situation.
Movement Upgrades Improve More Than Travel
Traversal abilities can open collectibles, shortcuts, safer infiltration routes and escape paths. Their value extends beyond moving more quickly.
Build Around Resource Efficiency
A powerful ability that empties the resource bar after one use may be less practical than a cheaper option that can solve several smaller problems.
Evaluate upgrades according to:
- How frequently the situation occurs.
- How much Amber or Quartz the ability consumes.
- Whether an ordinary gadget provides the same result.
- Whether the effect supports both infiltration and escape.
- Whether the upgrade opens exploration opportunities.
Use Runes to Strengthen a Clear Strategy
Runes and other passive bonuses are most useful when they support the actions Styx performs regularly.
Build around a consistent purpose, such as:
- Reducing supernatural resource costs.
- Improving stealth and concealment.
- Supporting gadget use.
- Increasing mobility.
- Strengthening assassination tools.
- Improving survival during emergency escapes.
Avoid a Collection of Unrelated Bonuses
Several small effects aimed at completely different playstyles may provide less value than a focused setup.
Change the Setup Before a Special Mission
A configuration designed for exploration may not be ideal for an assassination or no-detection challenge. Review the available bonuses before committing.
Explore Beyond the Objective Marker
The three major regions contain optional routes, side activities, resources and areas that may not be required by the main objective.
Exploration can reveal:
- Crafting materials.
- Runes and upgrades.
- Alternative entrances.
- Shortcuts between major locations.
- Optional objectives.
- Useful high-ground routes.
- Environmental storytelling.
- Paths that become valuable during later missions.
Explore from High Ground
Climb a tower, rooftop or cliff before choosing a direction. A high viewpoint makes the region's vertical structure easier to understand.
Do Not Follow the Marker in a Straight Line
The direct route often leads through the most obvious and heavily defended entrance. Approach from the side or above.
Return to Earlier Areas with New Abilities
The game uses Metroidvania-style progression, meaning newly unlocked traversal tools can open routes in regions visited earlier.
Return when Styx obtains abilities such as:
- The Grappling Hook.
- The Hang Glider.
- The Claw.
- Spectral Dash.
- Additional Quartz powers.
Remember Suspicious Locations
A distant platform, sealed barrier or unreachable opening is often a sign that a future ability will provide access.
Make a mental note of:
- High anchors without a current route.
- Compatible-looking barriers.
- Distant rooftops.
- Unreachable balconies.
- Walls marked with unusual textures.
- Gaps that appear suited to the Glider.
Revisiting Is Part of Progression
Do not assume an area was fully completed simply because its main objective is finished.
Use Side Quests to Learn the Regions
Optional objectives encourage exploration beyond the central route and can reveal shortcuts, resources and useful architecture.
Complete them when they:
- Pass through an unexplored part of the map.
- Provide an upgrade useful for the main story.
- Reveal a route near a future objective.
- Offer an opportunity to practise a new ability.
Do Not Force Every Side Objective Immediately
An optional area may become much easier after unlocking another traversal power. Return later rather than spending excessive resources on an awkward early route.
Listen to Enemy Conversations
Guard dialogue can reveal patrol changes, environmental opportunities, objectives and character routines.
Remain hidden and listen when enemies discuss:
- Food or drink.
- Restricted entrances.
- Missing keys or equipment.
- Shift changes.
- Important targets.
- Hazards in the environment.
Conversations Also Create Openings
Speaking guards may temporarily face each other, remain stationary or separate after the exchange. Wait for the most useful moment.
Understand Different Enemy Roles
Not every enemy presents the same threat. Some watch from range, some patrol quickly and others may resist ordinary assassination techniques.
Before acting, determine:
- How far the enemy can see.
- Whether armour prevents a direct silent kill.
- Whether the enemy remains stationary.
- Which other guards can observe the position.
- Whether the enemy controls an alarm or important doorway.
Remove Lookouts Before Ground Patrols
An elevated observer can watch several routes at once. Bypassing or distracting that lookout may make the entire area easier.
Do Not Test Enemy Immunities During a Live Infiltration
Use Quick Save before attempting an unfamiliar assassination against a new enemy type.
Prioritize Alarm Controllers and Lookouts
Some enemies create more danger than ordinary patrols because they can observe large areas or rapidly escalate a search.
Neutralize their influence by:
- Finding a route outside the lookout's view.
- Distracting them away from the post.
- Sabotaging the surrounding environment.
- Using an isolated silent kill.
- Completing the objective without entering their coverage.
Do Not Rush an Alarm Device
A direct sprint toward the control point may expose Styx to every guard in the room. Break sight and approach from another level.
Use Noise as Information
Footsteps, dialogue and doors can reveal nearby enemies before they enter the camera view.
Pause and listen near:
- Blind corners.
- Closed doors.
- Staircases.
- Narrow tunnels.
- Upper platforms.
- Rooms containing an objective.
Your Own Noise Matters
Jumping, landing, dropping bodies and interacting with objects can attract investigation. Avoid stacking several noisy actions in the same location.
Use the Camera Independently from Movement
Rotate the camera around corners, above ledges and beneath platforms before moving Styx.
A good camera routine is:
- Stop in cover.
- Inspect the next room.
- Check behind Styx.
- Look upward for anchors.
- Look downward for crawl spaces.
- Choose the next safe position.
- Move only after the camera confirms the route.
Reset the Camera Before a Precise Jump
Align the view with the destination. An angled camera can make the direction and distance harder to judge.
Use Targeting Selectively
Targeting helps track a dangerous enemy, but it can also pull the camera away from other hazards.
Use targeting when:
- Preparing a Grapple Kill.
- Following one guard through a crowd.
- Aiming a supernatural ability.
- Tracking a patrol while moving around cover.
Release the target when camera movement prevents you from seeing the escape route or nearby enemies.
Do Not Carry a Body Without a Destination
Carrying reduces mobility and can leave Styx exposed. Locate the hiding place before lifting the corpse.
The route should contain:
- No approaching patrol.
- Enough space to move around corners.
- No required jump or grapple action.
- A dark or isolated final position.
Drop the Body When the Situation Changes
When an unexpected guard appears, release the body and hide. Preserving stealth is more important than completing the cleanup immediately.
Use Consumables Before the Emergency Becomes Fatal
Health and Amber Flasks are limited, but saving them forever is not useful. Use them when they preserve a strong infiltration attempt.
Heal Only After Reaching Safety
A Health Flask cannot protect Styx from several enemies attacking simultaneously. Break sight first.
Restore Amber Before the Planned Ability
Do not enter the dangerous area and then discover the resource is insufficient. Refill from a safe position before beginning the sequence.
Avoid Refilling for a Nearly Empty Section
When the objective or checkpoint is only moments away, preserve the flask unless an ability is essential.
Adapt After a Failed Attempt
Repeating the same route without changing anything usually produces the same result. Identify the specific reason for failure.
Ask whether:
- You moved before the patrol cycle was complete.
- A second guard had an overlapping sightline.
- The landing created noise.
- The body was discovered.
- The ability ended in an exposed position.
- The escape route was not prepared.
- The selected gadget attracted the wrong enemy.
Change one part of the plan and test again.
Failure Reveals Information
A failed attempt can show patrol responses, reinforcement routes and search behaviour. Use that information rather than treating the retry as lost time.
Use Checkpoints as Planning Breaks
After reaching a safe checkpoint or objective transition:
- Review the map and destination.
- Check crafting resources.
- Refill useful gadgets.
- Inspect unlocked skills.
- Confirm the current ability setup.
- Create a clean save.
A minute of preparation can prevent repeated failures in the next restricted area.
Recommended Beginner Upgrade Priorities
Exact preferences vary, but new players generally benefit from improvements that provide consistent value.
Traversal and Mobility
Movement upgrades open alternate routes, collectibles and easier escapes. They remain useful throughout the game.
Resource Efficiency
Reducing the cost of frequently used powers lets Styx solve more problems before needing a flask.
Stealth and Detection
Bonuses that make positioning and concealment more forgiving are useful while learning patrol behaviour.
Versatile Gadgets
Upgrade tools that can distract, disable and support an escape rather than an item useful only in open combat.
Specialized Assassination Skills Later
Powerful kill techniques are useful, but mobility and stealth generally provide more value during the early campaign.
Advanced Infiltration Routine
Use this process when approaching a heavily defended objective:
- Reach a high or concealed observation point.
- Activate Amber Vision briefly.
- Identify every visible guard and lookout.
- Observe at least one complete patrol cycle.
- Find the objective and two possible approaches.
- Select a hiding place near the target.
- Identify a separate escape route.
- Confirm the required gadget or ability.
- Create a Quick Save.
- Move only when overlapping sightlines separate.
- Complete the objective without unnecessary kills.
- Leave using the prepared escape route.
This method takes longer during the planning stage but usually makes the actual infiltration much faster.
Advanced Escape Routine
When the alarm begins:
- Do not attack the entire group.
- Dodge the first immediate threat.
- Place solid cover between Styx and the enemies.
- Move away from the last known position.
- Change elevation using climbing, grappling or a drop.
- Use a distraction or power to delay pursuit.
- Enter a hiding position outside the search route.
- Remain still until the patrol begins dispersing.
- Relocate again before returning to the objective.
Do Not Reload Too Quickly
Some apparently disastrous situations can be recovered. Escaping an unexpected alarm teaches valuable routes and enemy behaviour.
Common Beginner Mistakes
Moving After Watching Only One Guard
Another patrol may enter from outside the camera view. Observe the whole area.
Killing Every Enemy
More kills create more bodies, noise and opportunities for discovery.
Ignoring Vertical Routes
The ground-level entrance is usually the most dangerous path.
Using Every Ability Immediately
Preserve supernatural resources for obstacles that ordinary stealth cannot solve.
Saving During Suspicion
Wait until awareness indicators have cleared and nearby patrols are stable.
Entering Without an Escape Plan
Objective interactions may change patrols or trigger new danger.
Carrying Bodies Through Active Routes
Locate the hiding place and clear the path first.
Remaining at the Last Known Position
Move after breaking sight because guards will investigate that location.
Gliding Directly Toward a Guarded Objective
Land nearby and observe before committing.
Forgetting to Revisit Earlier Regions
New traversal powers open previously inaccessible routes and rewards.
Frequently Asked Questions
Is Styx: Blades of Greed primarily a stealth game?
Yes. The game is designed around infiltration, observation, vertical traversal and avoiding direct confrontation. Combat is possible but extremely dangerous when several enemies are alerted.
Should I kill every guard?
No. Bypassing enemies is often safer and faster. Eliminate only guards who block an important route or optional objective.
How often should I Quick Save?
Save before risky jumps, major objectives, assassinations, limited-resource abilities and difficult guarded areas. Confirm the current position is safe before saving.
What should I do when detected?
Break line of sight, move away from the last known position and change elevation. Do not remain behind the first corner or attempt to fight the entire group.
What is the best way to avoid combat?
Observe patrols, use darkness and cover, travel above or below the main route and create distractions instead of attacking.
Are distractions better than kills?
They often are. A distraction can temporarily move several guards without leaving a body or permanently changing the patrol layout.
How should Amber Vision be used?
Activate it briefly from cover to identify guards, interactive objects and routes. Return to normal vision before precise movement.
What does the Quartz Compass do?
It indicates the general direction of Quartz-related objectives or points of interest. It does not automatically reveal the safest route.
What are the best early upgrades?
Traversal, stealth and resource-efficiency upgrades generally provide the widest benefit. Choose improvements that support how you regularly approach missions.
Should I save crafting materials?
Keep some in reserve so you can craft the tool required by an unexpected obstacle. Do not convert every ingredient immediately.
When should I use gadgets?
Use them when they create a clear opening, prevent an alarm, isolate a dangerous enemy or preserve more valuable supernatural resources.
How do I find alternate routes?
Look above and below the objective path for grapple anchors, climbable walls, tunnels, windows, ledges and Glider landing areas.
Should I explore every area immediately?
Explore what is safely accessible, but return later when a route appears to require an ability you have not unlocked.
Why should I revisit previous regions?
New tools such as the Grappling Hook, Glider, Claw and Spectral Dash can open hidden or previously unreachable paths.
How do I use the Glider safely?
Launch from height, identify the landing point first and avoid gliding through the direct view of lookouts or ranged enemies.
How do I use the Grappling Hook effectively?
Search above the normal camera angle for anchors and identify one as an emergency escape before entering a dangerous area.
Is Spectral Dash only an exploration ability?
No. It can also bypass dangerous sightlines and create useful escape routes through compatible obstacles.
How should I use mind control?
Move Styx's real body into safety first, then use the controlled character to change patrol positions, interact with the area or create an opening.
When should I use time manipulation?
Use it after planning the complete route. Spend the effect moving, stealing or escaping rather than deciding what to do next.
What should I do with bodies?
Move them away from patrol routes, doors, lights and frequently visited areas. Do not carry one until the route to a hiding place is clear.
Are doors useful for stealth?
Yes. They can block sightlines, divide patrols and delay searching enemies. Listen and inspect before opening them.
How can I handle armoured or difficult enemies?
Avoid testing an ordinary assassination without saving. Bypass them, manipulate their patrol, use an appropriate ability or find an environmental solution.
Should I reload immediately after detection?
Not always. Attempting an escape can reveal useful routes and teach you how enemies search. Reload when the situation becomes unrecoverable or violates an optional objective.
What is the safest overall strategy?
Observe first, enter from an unexpected vertical route, avoid unnecessary kills, keep one emergency resource and leave through a path selected before touching the objective.
Final Tips
The strongest advantage in Styx: Blades of Greed is information. A player who knows the patrol cycle, objective position, escape route and available environmental tools rarely needs to fight.
Use high ground to study each location, scan briefly with Amber Vision and identify at least two possible routes. Quick Save before testing a difficult sequence, but do not be afraid to experiment with the Grappling Hook, Glider, Claw, Spectral Dash, Amber abilities, Quartz powers and crafted gadgets.
Most importantly, resist the urge to clear every room. Styx succeeds by controlling what enemies see, hear and investigate. Enter quietly, steal greedily and disappear before the guards ever realize a goblin was among them.
See our Styx: Blades of Greed Controls Guide for the complete PlayStation 5, Xbox Series and PC control layout, including Ability Mode, Amber Vision, Quartz Compass, Grappling Hook, Wall Dash, Spectral Dash and Quick Save commands.
Comments
No comments yet. Be the first to share your thoughts!